Using the embedded PC and Wi-Fi: introduction
Overview - hardware and software
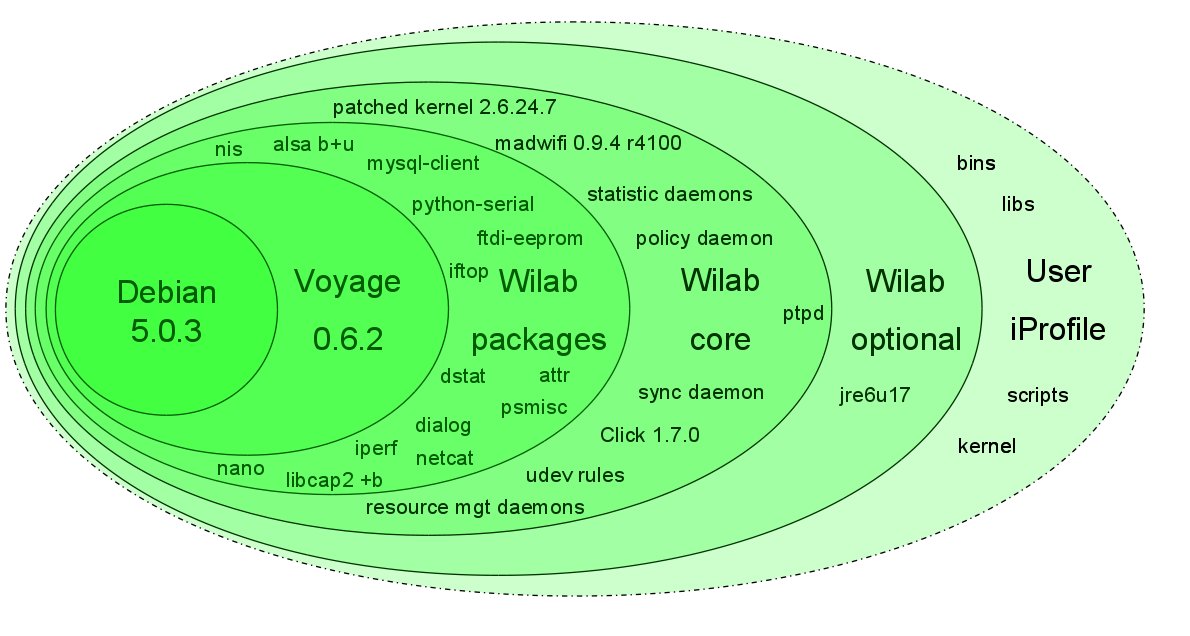
This article targets the use of the embedded PC in the w-iLab.t Zuiderpoort testbed. The embedded PC, together with all hardware and software is called an iNode. The iNode has following characteristics and specifications:
- Debian 5.0.3 (Lenny) Voyage distro 0.6.2
- Patched kernel 2.6.24.7 for click
- Click modular router 1.7.0 with all elements available in user level and as kernel module
- Wireless driver: madwifi driver with the accompanying tools
- All iNodes are time synchronization via ptpd IEEE 1588 standard
- Convergence (offset from master)
- < 100 us after ca. 8 min
- < 10 us after ca. 13 min
Configuring the iNode through an iPlatform - overview
For this introduction, we assume you are familiar with Linux basics such as file system mounts, basic bash scripting, and remote login.
An experimenter can configure every iNode (embedded PC) by configuring a so called iPlatform (editing iPlaforms is done via this link, which can be reached over a VPN connection and with a w-iLab.t login only). Simply put, an iPlatform is an experimenter-configurable collection of settings,binaries, scripts, libraries,etc. that is loaded onto selected iNodes by request of the experimenter, to let the iNodes behave as wanted by the experimenter. For example, an iPlatform could simply contain a script that configures an iNode as an access point. A second iPlatform could contain scripts to configure an iNode as a Wi-Fi client. A third iPlatform could contain (user-compiled) binaries and the necessary scripts and configuration settings to, for example, start a webserver, behave as a central routing database, etc. It is important to understand that an iNode can be configured in a similar way as you would configure any Linux PC on your desktop, by defining an iPlatform containing all necessar (bash) scripts, binaries, etc. Optionally, the experimenter may also specific kernel and initrd.
During the set-up phase of your experiment, you will then assign iPlatforms to a selection (or all) iNodes that you use during your experiment. Once your experiment is launched, it is also possible to log in to the iNodes via SSH (how this can be done is described on the user info page of the w-iLab.t web interface, log in/VPN required; do not forget to configure your IP (or IP range)). Once logged in to an iNode, the experimenter can gain unlimited access to the system via sudo. Alhough it is possible to write information to the flash card, we discourage this (e.g. avoid the use of 'apt-get install' and 'remountrw'), because writing to the flash card has a big impact on the maximum write cycles of the compact flah; additionally, when the flash card is mounted in read/write mode, node crashes can easily cause file system errors. We already had to replace a lot of flash cards, which is very time consuming thus expensive.
However, not writing to the flash card is not a problem, as multiple directories on the w-iLab.t fileserver, wilabfs.atlantis.ugent.be (access: see also the user info page, log-in/VPN required) are automatically mounted via NFS on the iNodes when scheduling an experiment:
- the /tmp/log on your iNode is mounted from ./log/ScheduleID/NodeID/ under your iPlatform root directory on wilabfs
- the user's home directory (and thus also iPlaform directory) on wilabfs is available on every inode
Therefore, we aks you to prepare the bins, libs and confs in the iPlatform directory on wilabfs (which you can of course organize in subfolders).
To automatically start scripts after the iNodes are booted, a special script is needed in the root of your iPlatform mount, with the name start_mount_code (needs to be executable!). This script will be invoked (by the Linux rc.local, at the end of the Linux boot process). This script could e.g. contain the command that is needed to automatically start your binary. It could also be used to configure wireless interface, mount additional directories, etc...
If needed, the user can power the iNode off and on during the experiment or during the debugging phase via the status tab on wilab (log-in/VPN required).
Now you know the basics, it is time to move on to the "iNode: use of Wi-Fi" tutorial.